The brakes on your vehicle are an essential safety feature, and it’s important to keep them in good working order. Over time, the brake pads will wear down, and they will need to be replaced. In this article, we will provide a step-by-step guide on how to change the brakes on most vehicles.
See what our customers are saying about our service.
[grw id=3149]
Some Procedures to Changing Brakes
Step 1: Preparation Before you begin, park your vehicle on a flat surface and engage the parking brake. Loosen the lug nuts on the wheel you will be working on, but do not remove them yet. Next, use a jack to lift the vehicle off the ground and place jack stands under the vehicle for added support. Once the vehicle is secured on the jack stands, remove the lug nuts and remove the wheel.
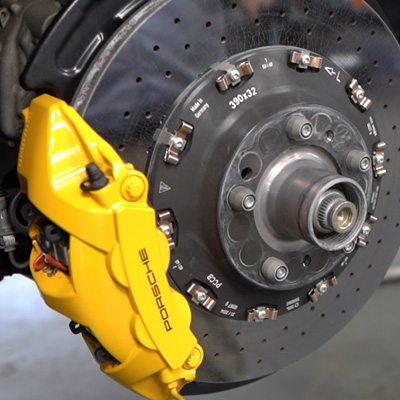
Step 2: Removing the Brake Caliper Once you have the wheel removed, locate the brake caliper, which is typically mounted on the rotor with bolts or pins. Use a wrench or socket to remove the bolts or pins and then remove the brake caliper. Be careful not to damage the brake line, as this can cause brake fluid to leak out.
Step 3: Removing the Old Brake Pads With the brake caliper removed, you should be able to see the old brake pads. These are typically held in place by clips or pins. Carefully remove the old brake pads, being careful not to damage the brake rotor. Inspect the rotor for any signs of damage or excessive wear. If the rotor is damaged or worn, it may need to be replaced.
Step 4: Installing the New Brake Pads Take your new brake pads and apply a small amount of brake grease to the back of each pad. This will help reduce noise and prevent vibration. Install the new brake pads into the caliper, making sure they are properly seated and secured in place.
Step 5: Reinstalling the Brake Caliper With the new brake pads installed, it’s time to reinstall the brake caliper. Use a C-clamp or brake caliper tool to compress the caliper piston back into the caliper housing. This will allow room for the new, thicker brake pads. Once the piston is fully compressed, slide the brake caliper back over the rotor and reattach it with the bolts or pins.
Step 6: Putting the Wheel Back On With the brake caliper reinstalled, it’s time to put the wheel back on. Tighten the lug nuts by hand as much as possible, then use a lug wrench to tighten them the rest of the way. Be sure to tighten the lug nuts in a star pattern to ensure even tightening.
Step 7: Test the Brakes Once the wheel is back on, lower the vehicle back to the ground and remove the jack stands. Tighten the lug nuts one final time with the lug wrench. Before driving your vehicle, pump the brake pedal a few times to restore pressure to the brake system. Test the brakes at a low speed to ensure they are functioning properly.
“Appointments fill up quickly — secure your spot now and keep your car running smoothly.”